 |
| Urban Doodles by Lorine Mason I am getting set to head out to Chicago first thing Saturday morning. I have decided that I will not, for the second time only in my career as a free-lance designer, to have a showcase of my work displayed at the trade show. I have decided instead to focus on my Crafty Couture entry. The Crafty Couture display will have a central location on the trade show floor at the convention center in Chicago and will contain 20 dress forms featuring the design work of CHA designer members. This is a wonderful opportunity to have your work in the middle of everything. How did I decide where my focus would be directed? I have been doodling forever but have refined my style over the past few years and this is a perfect example of what I can do with a black ink pen and some dye or paint. With my first love being all things fabric it made the decision of what to create so much easier. I chose a simple boat neck sleeveless dress design and an idea of what it might look like when I was finished. I am not one to sketch out designs, I tend to envision the possibilities and set to work. It always changes somewhat and that is what makes it fun. I used a dye called S.E.I Tumble Dye™ and a series of paintbrushes to 'paint' my dress. I am thrilled and only one thing could make it better. I wish I could actually wear the dress but alas the dress form and I are not the same size. My model is a dear family friend and she stepped right up and I love her for that. Thank you Jana, you are the best! |
Fast, Fun and Fantastic sewing inspired projects for your home, gift giving and making a few extra $$$ utilizing everything and anything from your craft cupboard, your recycling box and yes fabric too.
Monday, July 16, 2012
Crafty Couture
Thursday, July 12, 2012
Strip Tees - is the name too much?
Thinking of what to name a new product line can be fun and it can be a lot of work. I love the name Strip Tees as it perfectly describes what the product is; strips of T shirts that I use to create fun jewelry, hair accessories and home decor items. Stay tuned I might back down from the name and go simply with Tees, we'll see after the class I will be teaching with Ann Butler at CHA next week. I intend to ask the students their opinion, is it too much?
 |
| CHA Class Project by Lorine Mason |
Friday, July 6, 2012
Teaching our children to sew
 |
| Sew Fun Tote Box |
I recently wrote an article for the Sewing Savvy e-newsletter about sewing with your tweens and teens.I created a quick Tote project that I thought might be a great starting point for new sewers as it is made from two fat quarters of fabric and involves a number of basic sewing skills that they can practice while completing a wonderful project to take home. The base of the tote is created from a cereal box which adds wonderful stability and can be changed out whenever you feel it is necessary. Sewing can be fun but to keep it fun, it really is all about the fabric and the finished project. If it is not visually interesting you have lost most teens before they have even started. To check out the project above along with full instructions read my latest Sewing Savvy e-newsletter. The instructions and pattern diagrams can be printed direct from the newsletter, making it sew easy. I would love to hear your comments.
Lorine
Monday, July 2, 2012
Duetica & House Warming Gift
 |
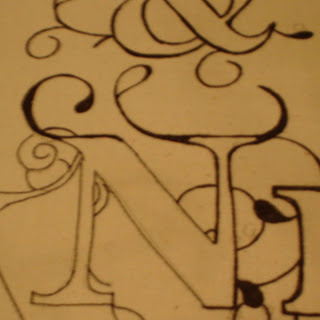
| Finished Design I recently acquired the membership to the Duetica Lettering Arts Studio which was recommended to me by my good friend, Eileen Hull. After talking with Mark and Adrienne at Duetica I was sold on the concept and will become one of their guest bloggers as I like the system enough to recommend it on my own. The Duetica Lettering Arts Studio provides for a very low cost access to numerous custom designed fonts and the ability to work between not only different fonts and sizes but each font comes in a variety of combinations that all seamless fit together. This is the first project I created using the system the first time out of the gate so to speak. Here is how I created this fun pillow which I intend to give a housewarming gift to my daughter . |
 |
| Tracing the Design onto your fabric. |
 |
| Adding weight to the Linework |
 |
| Painting in Designs |
Once you have completed your line work, painting and have heat set the inks and dyes it is time to create your pillow. There are many ways to make a pillow and sometimes simple is the way to go. For a detailed explanation of making your own pillow I suggest to go over to the Fairfield site as I have instructions along with some other great designers on exactly where to start and how to finish your own pillow.
Thanks for dropping by and be sure to check out Duetica, Fairfield and S.E.I to see what you can do.
Subscribe to:
Posts (Atom)
